5 Stunning Bathroom Remodel Designs

If you’ve decided to give your outdated, old bathroom an overhaul but aren’t sure what design style to choose, one way to find inspiration is to look at the latest trends in bathroom remodeling.

To help make planning your bathroom makeover a little bit easier, we made it our mission to gather the best bathroom designs we could find.

Explore our 5 stunning bathroom remodel designs and get inspired:


Continue reading

GNH How to Save Kitchen Remodel

How to Save Money on a Kitchen Remodel

How to Save Money on a Kitchen RemodelFind out how to save money on a kitchen remodel from GNH designer, Michele Gregg.

Are you dreaming of an updated kitchen but don’t have a huge budget to spend? Maybe you’re thinking of selling and want to bump up the value of your existing kitchen and make a great first impression? Well, you’ve come to the right place! From a few small cosmetic updates to a major reno, GNH kitchen designer, Michele Gregg shares her secrets for how to save money on a kitchen remodel.

If you’re looking to update your kitchen on a tight budget, there are many different approaches depending on the size of your project. There are a few tried and true updates that are low cost with big impact. But if you have a little bit more to spend, a well-placed upgrade can reap big rewards when it comes to resale value.

Here are a few simple ways to create a functional & aesthetically pleasing kitchen, without spending a fortune.

  1. Fresh coat of paint. A new wall color can change the room drastically!
  2. Wallpaper an accent wall. Wallpaper is making a comeback! Give the room a focal point… Easily add texture and depth.
  3. Hang a new light. Swapping out existing light fixtures will give a fresh update to your space. You can select a light to fit your desired style.
  4. Add undercabinet lighting. Undercabinet lighting is great for task lighting!
  5. Replace your faucet.
  6. Swap out your cabinet hardware. This is a great way to add some style to your cabinetry.

The best part? All these projects can be completed by a DIY homeowner on a weekend!

How to save money on a kitchen remodel - fresh coat of paint

For a full-fledged kitchen remodel, you can pick and choose what to upgrade in order to get the most bang for your buck.

Here are some recommendations for cutting costs on your kitchen remodel:

  1. New Design, Old Layout – Embarking on a new design using your existing layout will help keep labor costs and construction costs down. Relocating appliances, plumbing & electrical can inflate costs.
  2. Keep Existing Appliances – If you keep your existing appliances and replace only as needed, you can use that money elsewhere in the remodel. There are many appliances that you can swap out after your remodel is complete. With some appliances, advanced planning with your designer will be necessary. Example: Your current working refrigerator is a 32” wide, but you know you will want a 36” French Door refrigerator. Your designer can ensure your space will accommodate the future refrigerator.
  3. Avoid Costly Project Delays – With a kitchen remodel, it is more than just replacing cabinetry. Working with an experienced designer will help you navigate all aspects of this remodel. Designers stay up to date on trends & new materials. They are familiar with their local building codes and working with contractors. Their experience will translate into avoiding delays and will save you money in the long run.
  4. Choose Affordable Cabinetry – Cabinetry comes in a variety of pricing. All serve a purpose, when paired with the right application. Working with a designer will help you navigate the quality, customization, and necessities for your space & budget.
  5. Prioritize Needs vs. Wants – Make a list of ideas, necessities, and dreams for your space… prioritize them in order of most important to least important. Be realistic with yourself! Understand how certain cost-effective products can help with achieving your dream list. Or invest in top-desired items first and stretch your projects out over time.

About Michele

Michele has worked in the home improvement industry since 2012, gaining expertise in flooring, appliances, kitchens, and plumbing. in the fall of 2020 she joined GNH’s Kitchen and Bath Design Team in Windham. Learn more about her design process or set up an appointment to start planning your kitchen remodel today!


Interior Painting Made Easy: 7 Easy Steps

1142189-pa1340-1142190-pa3314

If the idea of interior painting sounds intimidating to you, then read on! Refreshing your home with a beautiful coat of paint is much easier than you think – and fun, too! The truth is, you really can save the cost of hiring a professional painter while achieving the same great results. Here’s how:

Follow these 7 easy steps to get your home looking fresh and new without breaking the bank!

  • Step 1: Cleaning.

    Clean the ceiling and wall surfaces that you plan to paint using water, a mild dish soap, and a cellulose sponge. Removing all dust, dirt and grease spots ensures a smooth finish!

  • Step 2: Prepping.

    Remove all electrical switch and outlet covers, wall sconces, picture hangers, and any other wall fixtures or attachments. Tip: Keep track of outlet screws by taping them to the covers as you go, something that I have learned the hard to do the hard way!

  • Step 3: Taping Off.

    Start with the ceiling. Use painter’s tape to mask around windows and woodwork such as baseboard, ceiling moldings and door frames. Once you apply the tape, run a plastic tool or putty knife along the tape to secure it firmly at its edges, and keep the paint from seeping underneath.

  • Step 4: Cutting In.

    Once you have masked everything you don’t want to paint, it’s time to “cut in.”  This means using a brush to cover the areas you can’t reach with a roller. Starting at the corner of the room, use a 2-inch or 2.5-inch trim brush to “cut in.”  Apply a three-inch wide strip of paint around the perimeter of the room where the wall and ceiling meet.

  • Step 5: Painting the Ceiling.

    Using a roller, you will now begin to paint your ceiling. Remember to remove any excess paint on the roller by slowly rolling it back and forth over the ridges of your paint tray. Begin painting in a corner of the room, blending the paint into the line you created in step 4. Paint across the width of the ceiling rather than the length of the ceiling.  Tip: Avoid straining your back and neck by rolling with a motion across your body (left to right).

  • Step 6: Painting the Walls.

    Once your ceiling is dry, you can begin to paint the walls.  Return to the same corner where you started to paint the ceiling.  Use a trim brush to carefully cut in along the wall-ceiling line. Extend that line two to three inches out from any windows, doors, or moldings. Once you’ve cut in around an entire wall area, use a roller to fill in the field. Tip: For efficiency, start in the corner of a wall and roll on a three-by-three-foot W pattern, then fill it in without lifting the roller. Continue in 3-foot sections until you’re finished, and only paint one wall at a time.

  • Step 7: Painting the Trim.

    Once the walls are completely dry, apply painter’s blue tape where the trim meets the wall. Paint the moldings, baseboard and the door and window frames with a two-inch angled brush. Paint the tops of the doors and windows first and work your way down so that you can remove any runs as you go. Baseboards should be painted last.

It’s that simple!  Remember to take your time throughout this process and enjoy your home’s fresh new look!

Supplies List:

Before you get started on your interior painting project, be sure to stop by GNH Home & Lumber for all your painting essentials!

  • Sponge
  • Dish soap
  • Bucket
  • Screw driver
  • Painter’s tape
  • Putty knife
  • Paint
  • 2-2.5″ trim brush
  • 2″ angled brush
  • Roller
  • Paint tray
custom-kitchen-design

Brighten Up Your Kitchen in 3 Easy Steps

custom-kitchen-designKitchens are often central to a home, both in terms of their physical location and with regards to their importance. It’s where we prepare our morning coffee, make the kids’ packed lunches, bake birthday cakes, and gather when hosting holiday dinners. So, why tolerate a dark and gloomy kitchen?

Instead of letting your dull, outdated kitchen get you down, give yourself the bright, new kitchen you really want to spend time in.

There are many tips and tricks to making your kitchen brighter, including these 3 budget-friendly kitchen improvement steps.

1. Fresh Paint

painting-kitchenThere are several kitchen elements that can be brightened up with a fresh coat of paint, including:

  • The Ceiling
    If the room’s ceiling is painted a dark color, or has dark wooden beams, it’s probably casting a pall over the entire room. Buy a can or two of white paint and give the ceiling a fresh coat! The bright white will reflect light instead of absorbing it, and you’ll be amazed at what a difference it makes. If you don’t want to use white, try a pale yellow or even a mint color.
  • Kitchen Cabinets
    If you like the layout of your kitchen and the style of your cabinets, you can give them a facelift by applying a coat of primer, two coats of paint and a protective top coat.To do this project correctly, you’ll need to remove all the doors, remove the hardware, tape the hinges, paint the base cabinets and use a sprayer to paint and topcoat the doors outside so you don’t see brush marks. The entire project could take over a week. But, you’ll notice a tremendous difference in the final result.
  • The Walls
    While you don’t have to paint your kitchen walls white, it’s generally better to use lighter colors. Sometimes just a coat of white paint on the wall will make a huge difference in your home’s freshness, and can even make the kitchen look bigger!

kitchen-lighting

2. Update Your Lighting

You would be amazed at what a difference it will make to replace your fluorescent lights with incandescent lights.

Florescent lights cast a darker tint around the room, while incandescent lights cast a pure white light.

Updating with bright white lights and adding about 10 can lights in the room will make your kitchen much brighter. Also, don’t neglect dark corners with your lighting design, and add more ceiling lights where it’s possible.


3. Make Full Use of Natural Light

natural-kitchen-lightIf you’re working with a dark room, chances are you don’t have a lot of natural light coming in, but it’s important to make the most of what you have.

If your windows are covered with dark shades or blinds, you’re blocking out your best chance for brightening up the room.

You can also use these tips to add more natural light to your kitchen:


  • Consider adding a skylight if you have that option
  • Choose light-colored window coverings that don’t completely block out the light.
  • If you prefer blinds, look for cloth blinds in a light fabric. Avoid wooden or plastic blinds that block out all the light.

If you’d like more advice or you have some questions about how to brighten your kitchen, stop on in one of our GNH locations to meet with a professional. It’s a proven fact that humans respond, act and feel better in a home that is bright and open. Brightening up your kitchen is a great start to feeling better and inspired!

Kitchen Design Tips: How to Do More with Less

Are you looking for kitchen design tips to help save you time and money? Well, you’ve come to the right place! Kitchen design options abound, so before you dive into the particulars of layout, material selection, and other options, it’s smart to have an overview of the terrain ahead.

Sometimes less is more when remodeling a kitchen. For example, if you’re tempted to knock down walls and redirect plumbing and electrical lines to help open up your smaller kitchen space, you will pay a premium for it. There may be other, more creative solutions that will give you more bang for your buck.

Here are a few key kitchen design tips to keep you on budget – and on time for project completion.

Continue reading

How to Create a Natural Kitchen Design All Your Own

The kitchen is the pivotal gathering place in most homes. We start the day with nourishment and meaningful conversation in the kitchen….and we reconnect at the end of a busy day in the kitchen, too. Kitchens have become much larger spaces, opening into the family room for entertainment value. But unfortunately, we’ve lost the natural kitchen designs we fondly recall from our grandmother’s homes.

In our efforts to streamline the preparation of meals and create more efficiency in the kitchen has led to the creation of more clinical, cold spaces. This is largely due to the surfaces. These days stainless steel, marble and tile are the dominant materials. White, gray and neutral tones have become the color palette.

To bring more warmth back into your design, you must learn to think of your kitchen in a more holistic context.

How do you do this?  Try to remember the things you loved the most about your grandmother’s kitchen. Your emotional connection to those warm kitchens of your past will provide clues to your personal style, as well as opportunities to bring some unexpected architectural elements and color back into a stark kitchen.

GNH Installs Kitchen Design

To begin your journey to a more natural kitchen design, consider these elements:

Set the Tone.

Natural-kitchen-design-setting-the-tone.jpg

Begin with a new color palette!

The simplest way to set a dramatic new tone is with paint and fabric. Bring in warm earth tones like gold, terra cotta, sage, copper and bronze. Be cautious of certain shades of red, warmer is better, so the tone should be more toward the yellow/orange range.

And don’t be afraid of dark tones…. like deep aubergine and indigo grays. You can add contrast with your furnishings, artwork and accessories.

Choose Dazzling Surfaces.

If you have the budget, copper or ceramic sinks can add some character and a strong element of design to the space. Keep the metals the same. If you start with copper, keep it everywhere: light fixtures, faucets, curtain rods and drawer pulls.

If you are adding a backsplash, consider pulling in bold design elements and accent colors with your tiles. If you go the antique route, use recovered tile or even pressed tin (sealed for safety). If you are stuck with white subway tile everywhere, get creative with hanging accents that pull in color.


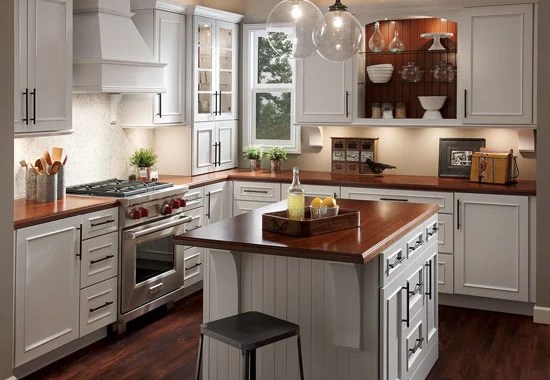
Wood Flooring & Cabinetry.

Natural-kitchen-design-wood-flooring.jpgWarm, wood-toned flooring is one of the easiest ways to warm up a kitchen. It adds a blanket of honey-hued color to a room, and also creates an organic feel.

If you already have a lovely neutral-toned tile floor, consider changing up your wood cabinetry instead.

There are a lot of white cabinets around today. Mixing things up a little adds character to your kitchen. If you already have white cabinets, consider keeping the white on the bottom cabinets, and painting the top in a softly contrasting hue.

Remember that dark floors and counter surfaces recede, so if you decide to play with color up top on the walls and cabinets, reserve the darker shades for the lower elements to ground your design and help showcase softer color narratives.

Go Natural.

Don’t be afraid to “go natural” with your accessories. Using cork, sisal and coir carpets can warm up tile flooring. They can also be stenciled to create a more personal element of design and coordinate with your fabric choices.

Simple window treatments with subtle patterns and textures can add tremendous visual interest to your kitchen. They also represent a great opportunity to experiment! If you’re not sure about using a bolder color palette, window treatments are the perfect place to try out different combinations to see if they work in your kitchen.

Natural-kitchen-design-plants.jpgIncorporate Plants.

Living green entities are the perfect focal points in a kitchen setting! Culinary herbs in terra cotta pots set right at your fingertips will help you execute that extraordinary meal. They also add fragrance and brightness.

By adding live elements to your kitchen, you create an ecosystem. Plants find a natural alchemy in any aesthetic. They draw you in. If you entertain frequently, plants can function as co-hosts. Fresh flowers create mood and fragrance, while culinary plants can be used to tantalize your guests about the coming meal.

Highlight Your Personality.

Most importantly, when creating a natural kitchen design, don’t forget to make your kitchen your own.

Your personality should always infuse your kitchen space. If you have a beautiful six-burner, gas chef’s range and a boring white tile back splash, why not create a piece of tiled artwork in its place? Hire a tile painter to create a unique, one-of-a-kind vista or place a leaning European cast iron fireback against the tile for a rustic effect.

Kitchens are also a great place to show off your collections. If you have open cabinets, use them to showcase your prized collections. If you are struggling with ways to infuse color, consider removing a section of top cabinet doors to create open shelving, or add glass paned doors. Paint the backdrop and let your beautiful dishes tell a color story. If you love architectural elements, use them in their natural state, don’t be concerned about painting everything to match.

Tip: Remember environments from your past that created natural warmth and emotional wellbeing, and pull those elements into your kitchen design. Make it personal. Design should always tell your personal story. This is what makes a house a home: a kitchen to remember!

Questions about your kitchen design project? GNH Lumber’s kitchen design team can help you choose the perfect cabinet to complete your kitchen style. Stop in to our showroom today to browse cabinetry to match any style or budget!

5 Kitchen Trends & Tips

Create a gorgeous, one-of-a-kind space that defines your home with these 5 simple kitchen design tips.

What’s trending for kitchens? Simplicity, elegance, and personality are still at the top of the list. But as we spend more time inside of our homes, functionality is increasingly important. No matter your budget, you can achieve a gorgeous new kitchen to match your style, and also create a practical environment for the whole family.

Here are 5 of our favorite kitchen design tips and trends:

1) Bring Back the Pantry

Kitchen Design Tips - Open Shelves

Do you want your kitchen to provide optimal food storage and free up wall space at the same time? You’re not alone! According to Homesandgardens.com, “Pantry cupboards have been kitchen staples for centuries and, in the last few years, have established themselves as one of the must-have items in modern homes.” They help organize food shopping and storage, and free up wall cabinets that are better used for storing dishware.

Design tip: storing food in a pantry frees up walls for open shelving, which is a great way to personalize your kitchen by displaying art pieces, antiques, or decorative dishware!


2) Quality Quartz

Kitchen Design Tips for 2021 - Quartz

Love the look of stone surfaces but afraid of the maintenance? Quartz is an excellent option! You can’t argue with its good looks: we love the consistency in patterns and color tones. But at the same time, Quartz’s non-porous surface means that it’s bacteria-resistant and low-maintenance! Not to mention durable for the realities of family life. This eye-catching surface, with all of its nuance and texture, is going to become the focal point of many new kitchens in the new year and beyond.

Design tip: pair boldly veined countertops with flat surfaced, neutral-toned cabinets to keep the quartz center stage.


3) Come to the Dark Side

Kitchen Design Tips for 2021 - Black Cabinetry

Already trending, black or dark-toned kitchen cabinetry is now a firmly entrenched design choice for a range of home styles.

Expect to also see darker kitchen walls, fixtures, and flooring that take this look to the next stage. Darker kitchens create a sense of elegance as well as coziness. They make larger kitchens feel inhabitable and warm. Plus, they are a perfect backdrop for light-toned countertops, or other features you want to command attention.

Design tip: dark or black kitchens help metal accents, faucets, and lighting fixtures really glow!


4) Built-In Office Space

Kitchen Design Tips for 2021 - Office Nooks

As the trend of working and studying at home becomes more of the norm, finding creative places to add a home office is key. A kitchen is a great place to add a multi-functional office space. Plus, it’s not always a major renovation project to add a home office or study zone. Start by finding a designated area just outside popular kitchen work zones, or in an adjacent hallway or entry area.

Thisoldhouse.com suggests placing a desk extension at the end of a long countertop. “To retrofit the desk, remove a seldom-used base cabinet. Then install a new drawer and end panels on either side of the knee hold to support the counter and give the desk a finished look.”

Design tip: When not in use, your kitchen office can double as a seated prep area for cooking and baking!


5) Make a Colorful Statement

Kitchen Design Tips for 2021

When it comes to kitchen designs trends in the coming year, color is king. Whether you paint a bold accent wall, choose colorful cabinetry, or add a bright and commanding backsplash—color is key to creating kitchen personality!

Design tip: Don’t overdo it! Choose your bright pops of color carefully, and then compliment these with a neutral or de-saturated palette. Adding too much and too many colors makes them all lose their impact.

Stop by GNH Lumber to speak with our design experts and get started on your remodel today!

5 Ways to Add Bathroom Storage Without Creating an Eyesore

Whether your bathroom is large or small, smart bathroom storage helps to keep things organized and reduce clutter. It can also enhance the style of your space.

Open shelving with stacks of towels evokes a contemporary, spa-like atmosphere. It also makes it more convenient for the whole family to reach for a towel or washcloth.

Here are 5 easy ways to add storage to your bathroom without creating an eyesore!

1. Wall Cabinet or Shelf

bathroom storageIf you have a small bathroom, you know that using every inch of space is essential.

An easy way to add an attractive bathroom storage unit is to install a wall shelf or a wall cabinet. The compartments of the fixture allow you to store things like towels, soaps, toiletries, or anything that won’t fit in your bathroom vanity!

Continue reading

9 Things to Consider Before Remodeling a Bathroom

The bathroom can be a tricky place for remodeling. If you have a very small bathroom, you may feel limited by what you can do. But even if your bathroom is the smallest room in the house, there are creative ways to fit all the essentials—shower, bath, sink, vanity unit—and enhance the style of your new bathroom!

There are several things to consider when planning a bathroom remodel.

Here is a list of the things you should keep in mind before beginning any renovation work:

Continue reading

Maximize Kitchen Space

5 Ways to Maximize Kitchen Space During the Holidays

Maximize Kitchen Space

December is a busy month for the kitchen. Many of us spend our time planning and shopping for the holiday season, as well as welcoming family into our homes.

While it’s an enjoyable time, it can get quite chaotic, especially when you’re the one that’s preparing all the food.

Get your kitchen design project started!

To save yourself some stress this holiday season, consider these tips for both reorganizing your home and maximizing kitchen space:Continue reading